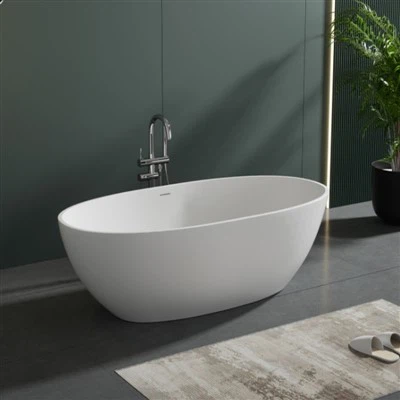
Installing an acrylic bathtub on your own can be a rewarding DIY project that not only saves you money but also gives you a sense of accomplishment. As a supplier of high - quality acrylic bathtubs, I'm here to guide you through the process step by step.
Step 1: Preparation
Before you start the installation, you need to gather all the necessary tools and materials. Here's a list of what you'll typically need:
- Tools: Tape measure, level, reciprocating saw, drill, screwdriver, adjustable wrench, caulking gun.
- Materials: Acrylic bathtub (you can choose from our wide range of options such as Modern Acrylic Bathtub, Clear Acrylic Bathtub, and Freestanding Acrylic Soaking Tubs), bathtub drain kit, plumbing pipes, silicone caulk, shims, and screws.
It's also crucial to measure the space where the bathtub will be installed. Make sure the area is clean, dry, and free from any debris. Check the floor for levelness. If the floor is not level, you may need to use shims to adjust the bathtub later.
Step 2: Remove the Old Bathtub (if applicable)
If you're replacing an old bathtub, you'll need to remove it first. Start by shutting off the water supply to the bathtub. This usually involves turning off the valves under the sink or at the main water supply.
Next, disconnect the plumbing. Use an adjustable wrench to loosen the nuts connecting the drain and the water supply pipes. Be prepared for some water to spill out, so have a bucket handy.
Once the plumbing is disconnected, remove the caulk around the edges of the bathtub using a utility knife. Then, use a reciprocating saw to cut through any brackets or supports holding the bathtub in place. Carefully lift the old bathtub out of the space and dispose of it properly.
Step 3: Prepare the Drain
Install the drain assembly according to the manufacturer's instructions. This typically involves inserting the drain into the hole in the bottom of the bathtub and tightening the locknut from underneath. Make sure the drain is properly sealed to prevent leaks.
Connect the drain pipe to the drain assembly. You may need to use a plumbing wrench to tighten the connections. Check for any signs of leakage by pouring a small amount of water into the drain.


Step 4: Position the Bathtub
Carefully lower the new acrylic bathtub into the prepared space. Use shims to level the bathtub. Place the level on the rim of the bathtub in different directions to ensure it is perfectly horizontal. Adjust the shims as needed until the level shows that the bathtub is level.
Once the bathtub is level, mark the locations for the screws on the wall where the bathtub will be attached. Drill pilot holes through the marked spots and insert the screws to secure the bathtub to the wall.
Step 5: Connect the Plumbing
Connect the water supply pipes to the bathtub faucets. Make sure the connections are tight to prevent leaks. You may need to use Teflon tape on the threads of the pipes to create a better seal.
Test the water supply by turning on the water valves. Check for any leaks around the faucets and the connections. If you notice any leaks, tighten the connections or replace the washers as necessary.
Step 6: Seal the Edges
Use a caulking gun to apply a bead of silicone caulk around the edges of the bathtub where it meets the wall and the floor. This will prevent water from seeping behind the bathtub and causing damage. Smooth the caulk with a caulk smoothing tool or your finger for a neat finish.
Step 7: Final Checks
Once the installation is complete, do a final check of the bathtub and the plumbing. Run a full bath of water to make sure the drain works properly and there are no leaks. Check the level of the water in the bathtub to ensure it is stable.
Tips for a Successful Installation
- Read the manufacturer's instructions carefully before starting the installation. Each bathtub may have specific requirements.
- Take your time during the installation process. Rushing can lead to mistakes and leaks.
- If you're not confident in your plumbing skills, consider hiring a professional plumber to assist with the more complex parts of the installation.
Conclusion
Installing an acrylic bathtub on your own is a challenging but achievable project. By following these steps and using high - quality materials, you can transform your bathroom with a beautiful new bathtub. As a supplier of acrylic bathtubs, we offer a wide range of products to suit your needs and preferences. Whether you're looking for a modern, clear, or freestanding acrylic bathtub, we have the perfect option for you.
If you're interested in purchasing an acrylic bathtub or have any questions about the installation process, please feel free to contact us for more information and to start a procurement negotiation. We're here to help you make the best choice for your bathroom.
References
- "Bathtub Installation Guide" - Home Improvement Magazine
- Manufacturer's Installation Manuals for Acrylic Bathtubs